Photography is an exciting, challenging and rewarding activity that can create some of the most beautiful memories for you and your loved ones. But it’s easier said than done – cameras aren’t cheap, there’s a lot of room for error, and not everyone has the same level of natural talent (or patience!). In this article we’ll take a look at some tips for beginning photographers, from camera settings to how to fool the camera into thinking you’ve had more success than you actually have!
What Equipment You Will Need
There isn’t one definitive answer to this question, as the equipment a beginner photographer might need will depend on his or her specific goals and preferences. However, there are some basics that almost any photographer should have in order to start creating photos.
Before starting out, it’s important to have a camera. There are a wide variety of options available to new photographers, so it’s up to you to decide what is best for you. A starter camera might be a good option if you want to learn about photography basics and take simple snapshots. Something more advanced, like a DSLR camera, will give you more control over your photos and allow for more creative expression. However, even a basic camera will allow you to take a great photobooth for sale of people and scenery.
Next, you’ll need some lenses. Most cameras come with a kit lens that captures wide-angle shots and a zoom lens that captures close-up shots. However, it’s always helpful to have more than one lens at your disposal so you can capture different perspectives of scenes. For example, you might want to use the zoom lens to get detailed shots of an intricate detail in your photo, or the wide-angle lens to capture the whole scene.
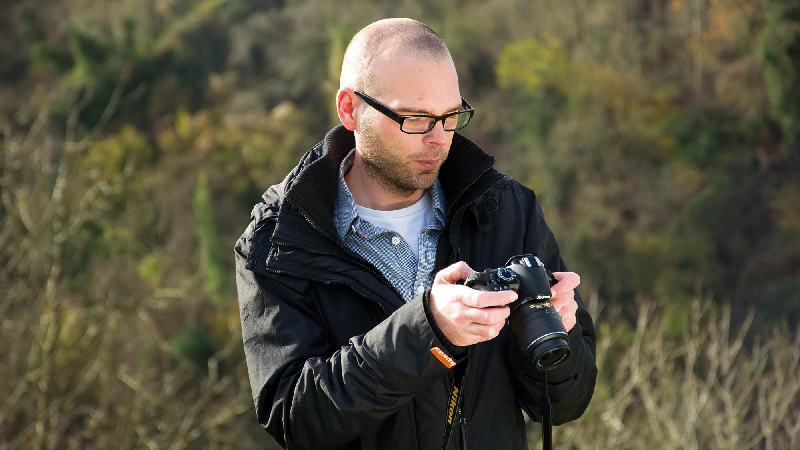
Gear
- Start with a basic camera. A beginner’s camera will not be as expensive as those used by professional photographers, and it will allow you to take photographs that are usable. A good starter camera is the Canon Rebel T6i.
- Get acquainted with your camera’s settings. Once you have your camera, be familiar with all its settings so you can take advantage of them in your photography. Many settings are easy to understand and change, such as shutter speed and aperture.
- Take pictures of what interests you. Do not feel obligated to photograph things that interest other people or that are popular in photography circles. There is no one right way to photograph things, so experiment!
- Upload your photographs to a free online photo album or service, like Flickr or Instagram, so others can see and critique your work. This will help you fine-tune your photography skills and learn from the critiques of others
Camera Settings
If you are just starting out as a photographer, it is important to understand the basics of camera settings. There are a few things you need to know in order to take great photos. Follow these simple tips and your photography skills will quickly improve.
- Always use a tripod when photographing stationary subjects. This will help to stabilize your camera and keep your photos looking smooth and professional.
- Use a wide aperture when shooting landscapes or cityscapes to boost the depth of field and create a more dramatic image. A wider aperture also allows for more light to enter the camera and results in a brighter image.
- When taking portraits, try to use a shallow depth of field to focus on only one or two specific areas of the subject’s face. This will create a flattering portrait that stands out from the crowd.
- When photographing people, always try to get them in natural light as much as possible. Artificial light (such as sunlight or artificial streetlights) can cause unwanted glare and harsh shadows in your photos.
These are just a few basic tips that will help you take better photos in any situation.
Lighting
There are a few things that you need to keep in mind when shooting photos. The most important thing is to have good lighting. Lighting will help to create a good mood for your photo and make it look more professional.
Here are a few tips for good lighting:
- Use natural light whenever possible. When shooting outdoors, try to use the sun as your main light source. If you can, find an area with some indirect light, like a tree or building behind you.
- When shooting indoors, try to find a bright window or light fixture and position yourself near it. You can also invest in a good photography lighting kit, which will include softbox lighting, LED light, Strobe light, and so on. This will help you create the perfect environment for your photos, and it will also make your photos look professional.
- If you’re using portable lighting, be sure to get a light meter so that you know how much light is needed for each shot.
Shooting Techniques
- Start with a Blank Screen: When you first start shooting photos, it can be intimidating to have all those images in your head of what your photo should look like. The best way to ease into photography is to start with a blank screen. Pretend you’re shooting for the first time and just take some shots. You’ll quickly learn what works and what doesn’t.
- Shoot in Manual Mode: Shooting in manual mode gives you complete control over your camera settings, which is ideal for beginners because it allows you to experiment without worrying about ruining your shots. You can also learn how to use aperture, shutter speed, and ISO to create desired effects.
- Use a Tripod When Possible: A tripod is essential for creating sharp photos that are free from movement blur. If you’re using a digital SLR, try using the Live View feature to help you compose your shots before shooting.
- Experiment With Lighting and Locations: Lighting can make or break a photo, so don’t be afraid to experiment with different locations and lighting setups.
Editing Tips
- Use the “Undo” and “Redo” buttons to backtrack through your edits.
- Preview your work in a different browser window or tab before saving. This way, you can be sure that what you see in preview is what will be saved on your computer.
- When cropping photos, be sure to crop tightly enough so that the photo remains an accurate representation of the original scene. Overcropping can make photos look blurry or distorted.
- To fix perspective problems in photos, use the “Transform” tool to distort one corner of the photo to correct the alignment of objects in the scene. This tool is found under “Edit” in most image editing programs.
- Use filters to enhance your photos and give them a unique look. There are hundreds of filters available online, and many photo editing programs have built-in filters as well. experiment with different filters to find ones that suit your style and mood for each photo.