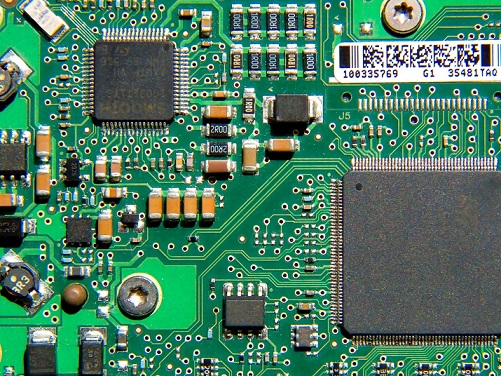
Introduction to PCB boards
Are you experiencing mysterious glitches in your electronic devices? Is your circuitry acting up and causing headaches? Well, the culprit behind these issues might just be a bad PCB board. But how can you tell if your trusty circuit board has gone rogue? Don’t worry, we’ve got your back! In this blog post, we’ll guide you through the world of PCB boards and show you how to test them using a multimeter like a pro. So buckle up and get ready to become an expert troubleshooter for your electrical woes!
Common Causes of PCB Board Failure
Common Causes of PCB Board Failure
One of the most frustrating things for any electronics enthusiast or professional is when a PCB board fails to function properly. Understanding the common causes of PCB board failure can help troubleshoot and prevent such issues in the future.
One common cause of PCB board failure is overheating. Excessive heat can damage components, leading to circuitry malfunctions and even complete system failure. This may be caused by inadequate cooling mechanisms, improper component placement, or high ambient temperatures.
Another frequent culprit is poor soldering. If connections between components and the PCB are not properly soldered, it can result in intermittent or non-functional circuits. Cold solder joints or excessive heat during soldering are often to blame.
Environmental factors also play a significant role in PCB board failures. Exposure to moisture, dust, chemicals, or extreme temperature variations can degrade components over time and lead to corrosion or short-circuits.
Electrostatic discharge (ESD) poses another risk for PCB boards. Even small amounts of static electricity that accumulate on surfaces can severely damage sensitive electronic components if discharged incorrectly.
Design flaws and manufacturing defects contribute to many cases of PCB board failure. Poorly designed layouts that fail to consider signal integrity or power distribution issues can result in performance problems down the line.
Understanding these common causes allows technicians and engineers to identify potential issues early on and implement preventive measures accordingly
how to test a PCB board with a multimeter
When it comes to testing a PCB board with a multimeter, there are a few key steps you should follow to ensure accurate results. First, make sure the power is disconnected and any components that may cause interference are removed. This will help prevent damage to both the multimeter and the PCB.
Next, set your multimeter to the appropriate voltage or resistance setting for the test you’re conducting. Start by measuring for continuity using the “beep” function on your multimeter. This will help identify any breaks in the circuit.
To check individual components on the PCB, such as resistors or capacitors, switch your multimeter to measure resistance or capacitance accordingly. Gently touch each lead of the component with your meter probes and observe whether you get a reading within an acceptable range.
For testing voltage levels on different points of the PCB, switch your multimeter to DC voltage mode and carefully connect one probe to ground while using another probe to measure specific points on the board.
Remember, proper handling and care is crucial when working with sensitive electronic components like PCB boards. Always refer to manufacturer guidelines and consult professionals if needed.
Importance of Regular Maintenance
Regular maintenance is a crucial aspect of ensuring the optimal performance and longevity of your PCB board. By implementing a regular maintenance routine, you can identify potential issues early on and prevent major failures or breakdowns.
One of the key benefits of regular maintenance is that it allows you to detect any signs of wear and tear in your PCB board. Over time, components may become loose or damaged, leading to poor connections or circuitry problems. Through routine inspections, you can quickly address these issues before they escalate into more serious problems.
In addition, regular maintenance helps to keep your PCB board clean and free from debris or dust buildup. Dust particles or other contaminants can interfere with the proper functioning of your electronics, potentially causing short circuits or malfunctions. By regularly cleaning your PCB board as part of your maintenance routine, you reduce the risk of such issues arising.
Furthermore, maintaining proper ventilation for your PCB board is essential for its efficient operation. Without adequate airflow around the components, heat can build up rapidly which may lead to overheating and subsequent damage to sensitive parts. Regularly checking fans and cooling systems ensures that heat dissipation remains effective.
Investing time in consistent upkeep not only prolongs the life cycle of your PCB board but also minimizes downtime caused by unexpected failures. It helps to maintain stable performance while reducing repair costs in the long run. Remember that prevention is always better than cure when it comes to electronic devices!
Conclusion
Understanding how to test a PCB board with a multimeter can be extremely valuable in diagnosing potential issues and ensuring the functionality of your electronic devices. By following the steps outlined in this article, you can confidently identify if a PCB board is bad and take appropriate measures for repair or replacement.
Remember that regular maintenance and proactive testing are crucial to prevent electrical failures and costly downtime. It’s important to stay vigilant when it comes to inspecting your PCB boards, checking for signs of damage or malfunction, and addressing any issues promptly.
Whether you’re an electronics enthusiast or a professional in the field, having knowledge about PCB board testing techniques will empower you to troubleshoot problems effectively. Keep in mind that while using a multimeter is one common method for testing PCBs, there may be other specialized tools available based on specific requirements.
Don’t hesitate to consult experts or refer back to manufacturer guidelines whenever needed. With proper care and attention, you can extend the lifespan of your PCB boards and keep your electronic systems running smoothly.
So go ahead, grab your multimeter, put on your detective hat, and start exploring the fascinating world of printed circuit boards! Happy testing!